PRINTING A PHOTO-
I opened the image I wanted to print in Photoshop, the photo was going to be printed on A4 paper.
I first cropped my image to how I wanted it. In some photos I also edit the colour and exposure but in this photo I only wanted to crop it.
I then clicked Image-Resize-Image Size. I wanted to make sure my photo would be the right size and quality to print in A4. I set the width to 30cm as this is the length of the paper. I also set the PPI to 300. This is the best resolution to print. 72 PPI is used for images for the internet or emails.
PPI - Pixels per inch
DPI- Dots per inch (the dots the printer makes on the paper)
SCANNER
To scan something to my computer I first opened the Image Capture app and set the scanner up. I positioned what I wanted to scan on the scanner and clicked Show Details on the computer. This shows what will scan and so you can change the position of the objects. I also decided to only scan part of it as there was a lot of background. I also checked the settings and set the 300 DPI because this is best to print. After I clicked scan.
Scanner Settings-

For the Epson Scanner: Doc type - Film
Film type - Positive film
Resolution - 300 DPI
For the Page Express scanner : Doc type- Reflective
Resolution- 300 DPI
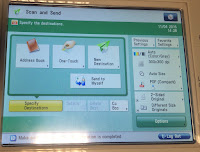
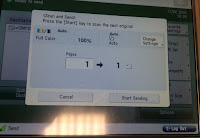
 The scanner in the printer can be used and the image emailed to you. You first have to log in onto the printer, press Scan and Send then send to myself. It will send it to your emailed saved with your login. You can then can then change the settings, I kept it on 300x3000 DPI and set it to A4. You then have to click the start button on the printer and Start Sending on the screen. The scanned image will come through in your emails.
There are a few different ways to import photos from cameras and phones. I either use iPhoto or Image Capture.
In the Image Capture app you just plug in the device and can chose where the photos are saved to.
iPhoto automatically appears when a device is plugged in, you just have to click which photos you want to import and they will be saved on iPhoto.
To save photos from the internet, you have to open the photo you want, right click and select Save Image as... You can then choose where it is saved to.
BACKING UP WORK
Backing up work is important as if they are lost from the original device you can get them back from different storage devices, such as hard drives, discs and USB sticks. I back up my photos onto an external hard drive and sometimes burn photos to a disc. An external hard drive is called malleable archiving because I can go back and edit the work and re-save it. Burning work to a disc is permanent as you can't alter the files.
BURNING TO DISC-
To burn to disc I went on iPhoto and exported a photo onto the desktop by going to File-Export. I made sure the file was a JPEG. I then insert a blank disc and opened Finder. Then I dragged the exported photo into the disc icon. After the photo had copied, I clicked File-Burn Disc- Burn. I can then eject the disc.
CORRECTING OVER/UNDER EXPOSED IMAGES-
The easiest way on Photoshop is to open the image and duplicate the layer. Then select the option to multiply from the drop down menu. Because the photo I choose was very underexposed I did this again to improve it.

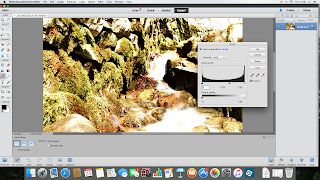
Another way on Photoshop is to adjust the levels. I adjusted it a few times to get the best exposure.
On the Photos app it is really easy to edit the lighting in a photo. When the image is open you have to click Edit. There is an option to change the exposure and you simply have to drag the line to who you want it.
WATERMARKING
Not everyone likes watermarks on their photos as they can be distracting from the image but they can be useful in stopping other people using your photo. It is also a good way to promote your company online.
How to do it:
Open up a new document in Photoshop and select the type tool. Type what you want for the watermark. You then make it into a custom brush by going to Edit-Define Brush Preset then name it. After clicking Ok this makes it into a custom brush. Then open up the image you want to watermark. Make sure your custom brush tool is selected and you can click where you want to put the watermark. You can make it smaller or larger depending on how obvious you want it to be. You can also change colour, selecting Overlay will make it blend in more with the photo. I chose to use a light green so that it went well with the rest of the photo. I made it slightly brighter than the grass to stand out.
Project 6 - Hand coloured image
Hand coloured images were first used at the turn of the century and were used by portrait photographers to introducer colour to black and white images. The black and white pictures where hand tinted by colourists and gave a hint of colour to the image. Often only part of the image is in colour.
How I made it:

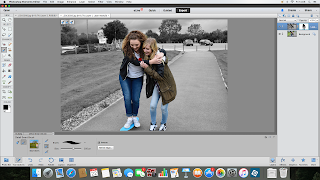
Fist I opened the photo I wanted to edit in photoshop and made a copy of it. On the copied layer I went to Image-Adjustments-Hue/Saturation. A dialogue box will open with three sliders, I dragged the saturation slider to make the image black and white.
Next I added a vector mask to the layer by clicking on the circle in a box at the top of the layers palette. After I selected the brush tool and made sure the foreground colour was black. I painted over the people in my photo which is what I wanted to be in colour. I toned down the colour to make it more like a hand coloured image by going to Image-Adjustments-Levels, a dialogue box opened and moved the gradient slider (black arrow) to the right which makes the colour more subdued.
To add a bit of colour to the rest of the photo I adjusted the opacity in the hue/saturation layer.
I added a yellow tint to the whole image and exported it.
I like the how the final image looked. The editing gives it a vintage feel to it. The steps to creating it where good as you can adjust a lot of steps to make your image look how you want it to. I would definitely use this process again as I think it could improve a lot of photos and give them a different mood.
I could use this editing technique in portraiture. If I was to do wedding photography I think this would be good to use on portraits of the bride and groom. If you use this effect in all the wedding photos it will be a good way to link all the photos together in a series. It would give the photos a vintage feel. Also I will use it in other portraits where I want the images to have an old look to them.
Copyright for photographers means owning property. It protects an image being used without consent. If you own a photo you can reproduce it, distribute copies and display it publicly. The photographer who toke the photo owns copyright to that photo. The exception is when the photographer is hired to take photos for an employer.
You are infringing the photographers copyright if you download, photocopy, rephotograph it or scan it. You have to have permission from the photographer to be able to copy it legally.
Copyright of a photo lasts for 70 years after the photographers death.
You can protect your own images by watermarking them and insuring any public photo can be traced back to you.

An example or a copyright issue was when a macaque took a selfie. Nature photographer David Slater from Wales travelled to Indonesia where he set up a camera on a tripod and left the remote trigger accessible to the macaque. A female macaque pressed the remote trigger and took several photos.
Slater licensed the photos to an agency under the presumption he owned the copyright to the photo. He said this was because he had engineered the shot and predicted that the macaque was going to take the photo.
The copyright claim was questioned and taken to court as it was the macaque that actually toke the picture. It was decided that the monkey can't own the copyright. Since the US Copyright Office has updated policies that would register copyrights only for work produced by human.
EVALUATION
From this unit I have learnt and used all the techniques on a Mac that I need to Import, edit and export images. I have also learnt about the different files, storage devices and files on the computer. I found it interesting researching into copyright as I didn't realise the rules for it. From this unit I feel more confident about how to safely use the computer in the process of saving and moving my photos.


No comments:
Post a Comment