Activity 1- Faceless portriats
Brief- Make a series of portraits without showing a subjects face.
Portraits
Official definition- 'A painting, drawing, photograph, or engraving of a person, especially one depicting only the face or head and shoulders'
My opinion is that a portrait has to include a person in the photo. I think a portrait can give an impression of how someone is feeling, this is done by looking at their facial features. A portrait normally focuses on the face of the subject.
Research
I looked at a book called 'FACE' by William A. Ewing. Inside was a series of portraits which had no faces. These are some of the ones I found most intriguing:
Murielle Michetti - Untitled (Opaque series)

Maya Dickerhof - (Memory series)

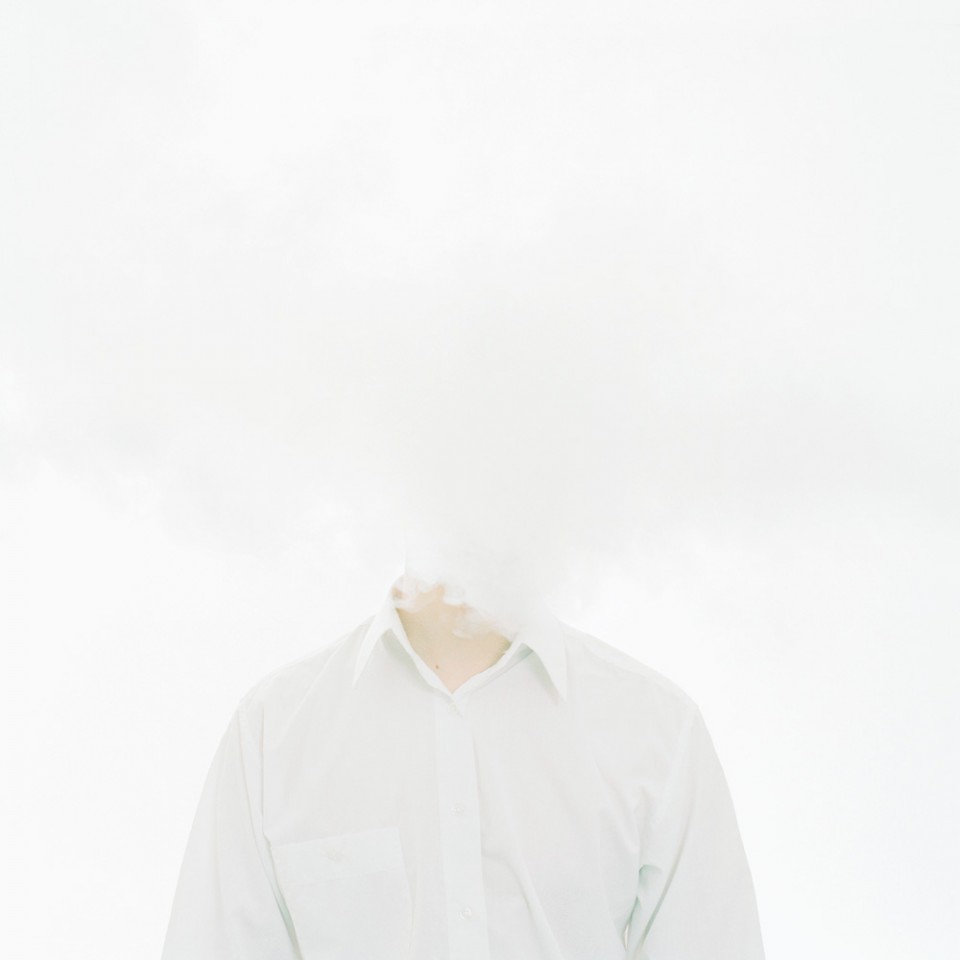
Axel Antas - White Portrait
Patrick Tosani - Portrait 17

I find this photo most interesting as the I feel there is a lot of questions that could be asked when looking at the image. Firstly I wonder what the braille means, could it link to the photo. Also why there is braille on the image. Braille is for people who can't see so it is interesting that it is on a photo that they won't be able to see. I like the idea of having the whole photo out of focus to not include the face, it makes it look mysterious.
PATRICK TONSANI-
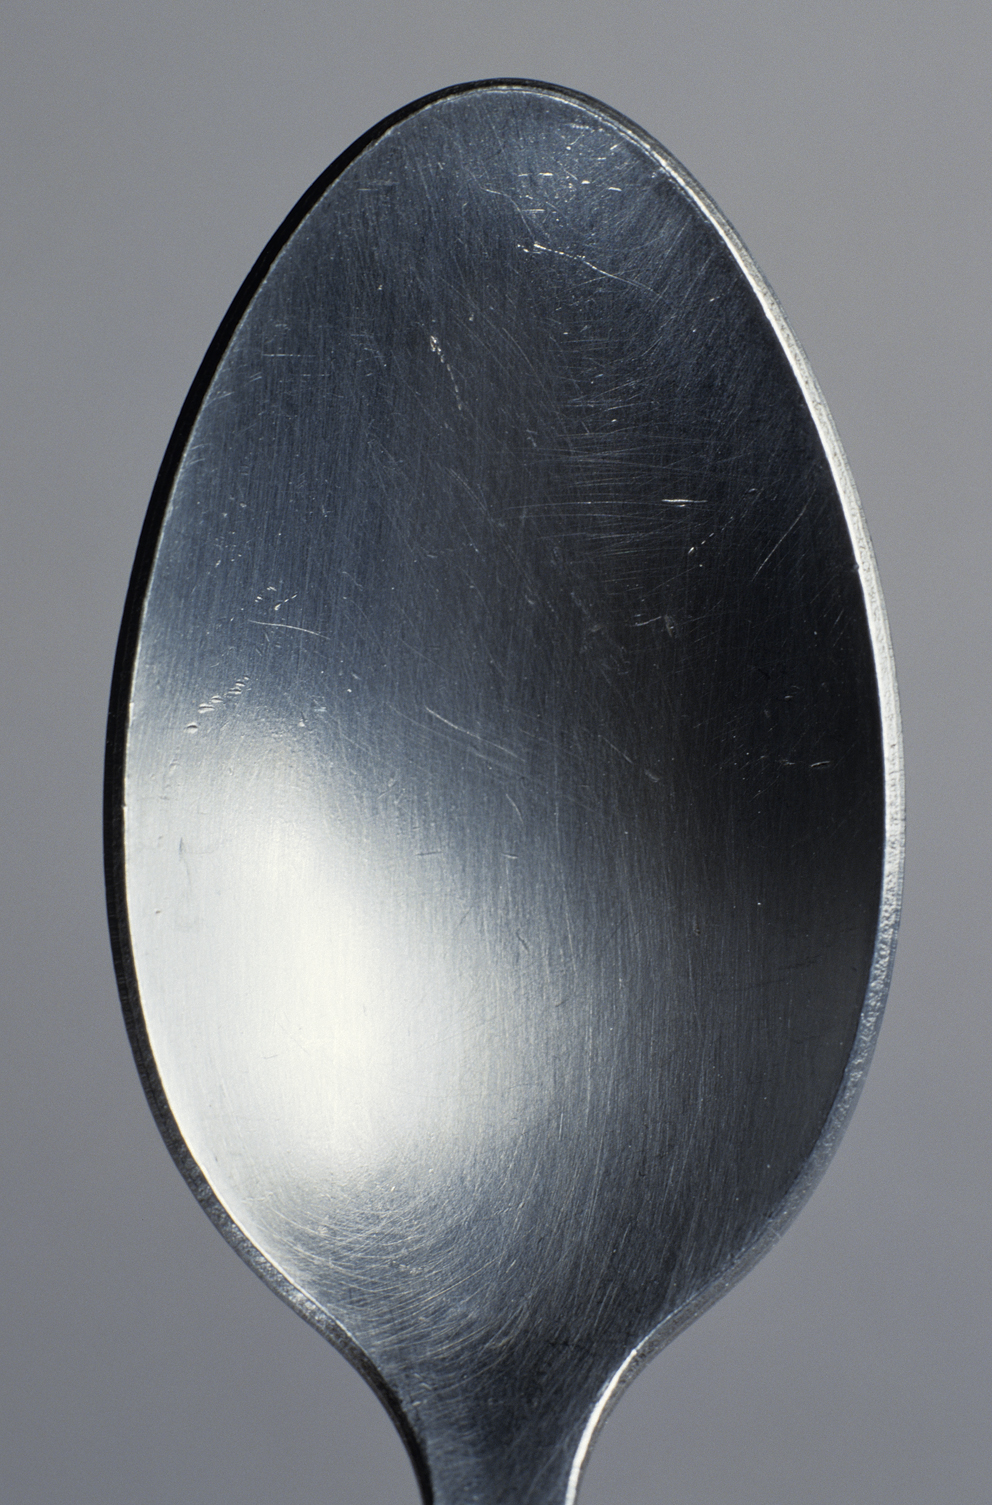
Patrick Tosani is a French photographer, born in September 1954. His work is often of isolated objects such as spoons, clothing, shoes


I like the portraits that Patrick Tonsani took but I don't like the rest of his work as I find it quite dull. The colours are boring, and in the left picture for example, the composition is also boring. It is simply a photo taken straight on of a spoon.
Plan

I am going to experiment with a few ideas to which works best to create a faceless portrait.
Experimenting with ideas
1.
My first idea for a faceless portrait was to edit the face out on photoshop using the smudging and blurring tools. I took a few simple portrait to experiment with on photoshop.
 I opened up my photos in photoshop and simple used the smudge tool to smudge out the face.


The photo on the left worked to best because the smudged face fitted in with the rest of the person. I only smudged to the edge of the face. The photo on the right wasn't successful as the smudging looks out of place. I tried to get rid of the facial features but keep in the creases of the face to show some expression. I didn't like the effect this gave, so I won't use this technique again.


I next tried using a different tool on photoshop that uses thinner lines to smudge. I really like the outcome as it looks softer to the previous ones. They are quite creepy but interesting to look at. On the bottom right photo I took inspiration from Patrick Tosani, in his portrait I researched the whole photo was out of focus so when I edited my own photo I decided the smudge the whole photo not just the face.
2.
Another idea I had was of getting some portraits developed, then scratching, sewing or just destroying the face in the photo. It will be the kind of thing you would see on a horror film so I think the finished photos will be really effective.


 First I used a compass to scratch onto the photo. It wasn't as successful as I had planned because I think the point of the compass was to thin and didn't give the effective I had hoped for. The lines where to thin and the photo starting ripping a bit. I decided to burn the next one, I used a lighter and placed the face on the photo above the flame. The main part went black and left a bit of a hole in the photo but I was really happy with the result.

With the next one i sewed onto it. I used red thread so it would stand out against the photo. I like the final outcome as it is an interesting way of showing a faceless portrait. My final idea was to use bleach as I thought it would burn through the photo, but it just got rid of some of the colour and made some parts orange. I think this was really effective but I can't use it as a final image as you can still see the face.
I think the first 3 photos were intriguing to look at as you can't tell what is the expression on the subjects face. My best ones where the burnt one and the one which was sewn on.
3.
My last idea is quite open at the moment as I have a few ideas for it. I plan to cover the subjects face with an object, something random like a lampshade or cloth.
 I decided to make a mask out of plaster of paris. Then I took photo in a woods to make it look more sinister. I also took photo in everyday situations like driving, this makes it look as if the model is emotionless. I think its like somewhere carrying out their daily routine without emotions or hiding emotions.


I really like the photos I got for this shoot because of how they add more of a meaning to the image. They also look quite creepy.
Final Images


I chose these as my final images as they show a unique way of taking a faceless portrait. I am happy with these photos as the mask ones a quite creepy and this is effective. The photos where I destroyed them after are showing faceless portraits in a different way. It makes you question why they have been destroyed the way they have. Also I like that its not the original photo that is faceless but that it was done afterwards.
Activity 2 - Looking through
Brief- make a series of photos which you have photographed through things
Research-
SAUL LEITER


BORN - December 1923, DIED- November 2013
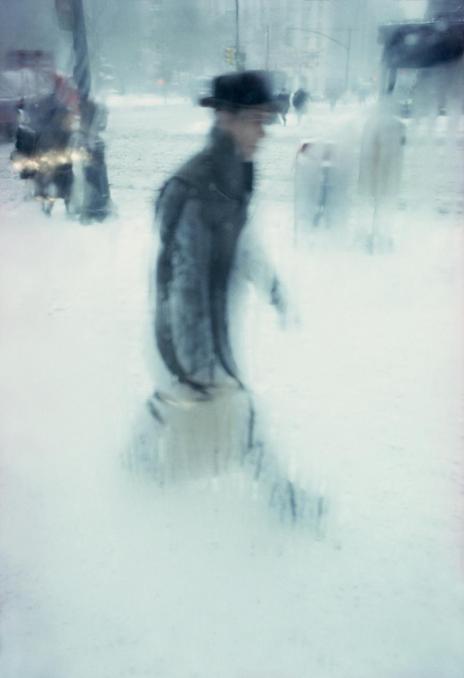
Saul Leiter was an American photographer and painter whose work in the 1940s and 50s was an important part of what became recognised as the New York School of Photographer.
In these photos he has taken it looking through a window. I think this is really effective as it adds more to the photo. The top photo is interesting as it looks like the photo has 2 layers in it, whats through the window and the reflection. It looks like double exposure. The bottom right photo used the window as a frame. The misted up part of the window frames the person who is the main subject.
I like his work looking through windows and has inspired me to see how taking pictures through things can be good for framing and adding more to a photo.
LEE FRIEDLANDER


BORN - July 1934
Lee Friedlander is an American photographer and artist. Lots of his photos include reflections and are often parts of a city. His work is quite documentary as he captures everyday life in cities.
My favourite work of Lee Friedlander is his 'America by Car' series. He takes photos of parts of America taken through a car window. I like this as it adds depth to the photo and also frames what is in the background. The mirror is also interesting as it shows you more of the landscape. In some photos the reflection in the mirror is very opposite to the main part of the photo.
Lee Friedlanders and Saul Leiters work are both similar and show how effective it is to take a photo through a window or object to frame the photo.
Try out images-
I used a sweet wrapper and put it over the lens like a filter. Although it made the photo a bit out of focus, I like that it gave a vintage kind of effect. I could use different colour wrappers to give the photo a coloured tint.


I got a glass ball and took photos looking through it of different subjects. I think it looks interesting as the image in the ball is opposite way round to how we see it. I am going to take more photos through it of buildings.
Reshoot-
I reshot some more images looking through the glass ball but focusing on buildings as the subject.

Final Images-


I like my photos from this shoot because I think they are unique. I also like that the image in the glass ball is upside down as I think this is more interesting to look at. I made it so you can see the ball in the foreground and the subject in the background so you can compare. The background is out of focus so that the main focus is on the glass ball.
Activity 3 - Scanning Still Lives
Brief- Explore the potential of a scanner to make photographic image; make a series of images by placing objects on a scanner.
Research
JESSICA SUMMERS
Jessica Summers is an English photographer, who creates surreal images through a scanner. She uses natural objects and composes together them to create a bigger picture.
She was inspired by Robert Creamer, and also influenced by Andy Goldsworthy. In an interview Summers said that her main inspires for her work was the beauty of stuff she finds, like nature.
The main thing I like about Jessica Summers work is the contrast between the black background and the objects. Also how all the objects fit together well to create a new meaning to the image. Her work has inspired me to use natural objects to create a new composition on the scanner.
IRVING PENN
BORN- June 1917, DIED - October 2009
Irving Penn was an American photographer who is known for his fashion, portraits and still life photography. He has worked at Vogue Magazine and independent advertising work.
Penn was influenced to start photography by Alexander Liberman.


I decided to research Irving Penn because of the objects he photographs and how he photographs it.
I chose to look at these photos in particular because they are taken from above which makes it look similar to how it looks on a scanner still life. In his work he uses a while background which gives a completely different feel to Jessica Summers work, where she used a black background. I like how he has arranged the objects like the right picture he has put things together to create something else. The other two look like collections of things. I think both of these illustrate death as the fruit is dying, it shows that everything dies.
What I did:


Try out images

I first experimented with trying different things with the scanner and to see what kind of photos I could get using it. I put a leaf in and I really like how much detail of the leaf was shown. I then tried keeping the lid of the scanner open (second photo) to see how it would effect lighting but it wasn't successful. After I tried similar things with my hand in there. I think these photos are successful as they are quite unique and creepy. I am going to use objects that will symbolise something and give a meaning to the photo.

Next I chose to use more objects and try how is best to arrange them in the scanner. I chose objects that all represent travel as this is something I'm really interested in. One thing I found difficult about arranging the objects on the scanner was that I couldn't see what the photo was going to come out like, I don't why the image didn't show on my computer.
Final Images


I am happy with the still life scanning photos, I decided to use a black background for my final images as I think it makes the colour of the flowers stand out more.
Firstly I used just flowers, the yellow ones were beginning to die which I think is effective as it shows that everything has to die. I then used some pink flowers, these could symbolise beauty and love.
After I decided to add other objects, the mask suggests hidden identity and disguise. This is quite interesting when put together with the flowers. I found that only the part of the objects that was touching the surface of the scanner were in focus and this created a really shallow depth of field. I think this is good as it makes the photo more mysterious.
I then used a guitar ornament with the flowers. This could suggests somebodies love for music. This photo was also successful as the pink flowers lighten up the photo because the colour of the guitar is quite dark.
Activity 4 - Darkroom Experiments
Research
Shadow Catchers - The Victoria and Albert Museum held an exhibition of camera-less photography in 2011 called Shadow Catchers. This included work by Pierre Cordier, Susan Derges, Adam Fuss, Garry Fabian and Floris Neusüss. They create there work by casting shadows on light sensitive paper or by chemically manipulating its surface. This creates surreal effects and symbolic content.
This is some of the work from the exhibition:


SUSAN DERGES
Susan Derges (born 1955) is a photographer specialising in camera-less photography. A lot of work has been made outside at night, using the natural world as her dark room. She would put large sheets of photographic paper in a river and use the moon and flash light to create the exposure. She says in a video that she examines the imaginative and magical world of nature and what is can represent.
Susan Derges' work is really effective as the detail is so clear in each image. Some of the photos are quite abstract but are composed in a way that makes them interesting to look at. I really like Derges work because of how unique it is, its more fascinating that it made by not using a camera. The effects the water has on the prints is interesting as it from the natural flow of the water.
What we did:
We worked in pairs so one of us could use the flash and the other person would splash the water.
First we placed photo paper in a tray of water and shook the tray around to create splashes and ripples. When ready the other person fires the flash, we had to coordinate with others in the darkroom to make sure their work wasn't re-exposed. We then processed the print which was 2 minutes developing, stop for 30 seconds, 2 minutes fixing then 5 minutes in the water wash.


I enjoyed experimenting with this in the dark room, I wasn't able to tell what the photo was going to turn out like until I developed it. This was quite good as I didn't know what to expect. I am happy with the final images as they are quite abstract. I think in the first photo it looks like a hand in the bottom corner, even though it there was no hand there. This is what I think what makes these images interesting. I think it looks better when the water was splashed more because more ripples were created. If I did this again I would try different effects like dripping or pouring water into the tray to see how it effects the ripples.
Final Images


Activity 2 - Looking through
Brief- make a series of photos which you have photographed through things
Research-
SAUL LEITER

BORN - December 1923, DIED- November 2013
Saul Leiter was an American photographer and painter whose work in the 1940s and 50s was an important part of what became recognised as the New York School of Photographer.
In these photos he has taken it looking through a window. I think this is really effective as it adds more to the photo. The top photo is interesting as it looks like the photo has 2 layers in it, whats through the window and the reflection. It looks like double exposure. The bottom right photo used the window as a frame. The misted up part of the window frames the person who is the main subject.
I like his work looking through windows and has inspired me to see how taking pictures through things can be good for framing and adding more to a photo.
LEE FRIEDLANDER
Lee Friedlander is an American photographer and artist. Lots of his photos include reflections and are often parts of a city. His work is quite documentary as he captures everyday life in cities.
My favourite work of Lee Friedlander is his 'America by Car' series. He takes photos of parts of America taken through a car window. I like this as it adds depth to the photo and also frames what is in the background. The mirror is also interesting as it shows you more of the landscape. In some photos the reflection in the mirror is very opposite to the main part of the photo.
Lee Friedlanders and Saul Leiters work are both similar and show how effective it is to take a photo through a window or object to frame the photo.
Try out images-
I used a sweet wrapper and put it over the lens like a filter. Although it made the photo a bit out of focus, I like that it gave a vintage kind of effect. I could use different colour wrappers to give the photo a coloured tint.


I got a glass ball and took photos looking through it of different subjects. I think it looks interesting as the image in the ball is opposite way round to how we see it. I am going to take more photos through it of buildings.
Reshoot-
I reshot some more images looking through the glass ball but focusing on buildings as the subject.

Final Images-


I like my photos from this shoot because I think they are unique. I also like that the image in the glass ball is upside down as I think this is more interesting to look at. I made it so you can see the ball in the foreground and the subject in the background so you can compare. The background is out of focus so that the main focus is on the glass ball.
Activity 3 - Scanning Still Lives
Brief- Explore the potential of a scanner to make photographic image; make a series of images by placing objects on a scanner.
Research
JESSICA SUMMERS
Jessica Summers is an English photographer, who creates surreal images through a scanner. She uses natural objects and composes together them to create a bigger picture.
She was inspired by Robert Creamer, and also influenced by Andy Goldsworthy. In an interview Summers said that her main inspires for her work was the beauty of stuff she finds, like nature.


The main thing I like about Jessica Summers work is the contrast between the black background and the objects. Also how all the objects fit together well to create a new meaning to the image. Her work has inspired me to use natural objects to create a new composition on the scanner.
IRVING PENN
BORN- June 1917, DIED - October 2009
Irving Penn was an American photographer who is known for his fashion, portraits and still life photography. He has worked at Vogue Magazine and independent advertising work.
Penn was influenced to start photography by Alexander Liberman.
I decided to research Irving Penn because of the objects he photographs and how he photographs it.
I chose to look at these photos in particular because they are taken from above which makes it look similar to how it looks on a scanner still life. In his work he uses a while background which gives a completely different feel to Jessica Summers work, where she used a black background. I like how he has arranged the objects like the right picture he has put things together to create something else. The other two look like collections of things. I think both of these illustrate death as the fruit is dying, it shows that everything dies.
What I did:
To scan something to my computer I first opened the Image Capture app and set the scanner up. I positioned what I wanted to scan on the scanner and clicked Show Details on the computer. This shows what will scan and so you can change the position of the objects. I also decided to only scan part of it as there was a lot of background. I also checked the settings and set the 300 DPI because this is best to print. After I clicked scan.


I first experimented with trying different things with the scanner and to see what kind of photos I could get using it. I put a leaf in and I really like how much detail of the leaf was shown. I then tried keeping the lid of the scanner open (second photo) to see how it would effect lighting but it wasn't successful. After I tried similar things with my hand in there. I think these photos are successful as they are quite unique and creepy. I am going to use objects that will symbolise something and give a meaning to the photo.

Final Images


Firstly I used just flowers, the yellow ones were beginning to die which I think is effective as it shows that everything has to die. I then used some pink flowers, these could symbolise beauty and love.
After I decided to add other objects, the mask suggests hidden identity and disguise. This is quite interesting when put together with the flowers. I found that only the part of the objects that was touching the surface of the scanner were in focus and this created a really shallow depth of field. I think this is good as it makes the photo more mysterious.
I then used a guitar ornament with the flowers. This could suggests somebodies love for music. This photo was also successful as the pink flowers lighten up the photo because the colour of the guitar is quite dark.
Activity 4 - Darkroom Experiments
Research
Shadow Catchers - The Victoria and Albert Museum held an exhibition of camera-less photography in 2011 called Shadow Catchers. This included work by Pierre Cordier, Susan Derges, Adam Fuss, Garry Fabian and Floris Neusüss. They create there work by casting shadows on light sensitive paper or by chemically manipulating its surface. This creates surreal effects and symbolic content.
This is some of the work from the exhibition:

SUSAN DERGES


Susan Derges (born 1955) is a photographer specialising in camera-less photography. A lot of work has been made outside at night, using the natural world as her dark room. She would put large sheets of photographic paper in a river and use the moon and flash light to create the exposure. She says in a video that she examines the imaginative and magical world of nature and what is can represent.
Susan Derges' work is really effective as the detail is so clear in each image. Some of the photos are quite abstract but are composed in a way that makes them interesting to look at. I really like Derges work because of how unique it is, its more fascinating that it made by not using a camera. The effects the water has on the prints is interesting as it from the natural flow of the water.
What we did:
We worked in pairs so one of us could use the flash and the other person would splash the water.
First we placed photo paper in a tray of water and shook the tray around to create splashes and ripples. When ready the other person fires the flash, we had to coordinate with others in the darkroom to make sure their work wasn't re-exposed. We then processed the print which was 2 minutes developing, stop for 30 seconds, 2 minutes fixing then 5 minutes in the water wash.


I enjoyed experimenting with this in the dark room, I wasn't able to tell what the photo was going to turn out like until I developed it. This was quite good as I didn't know what to expect. I am happy with the final images as they are quite abstract. I think in the first photo it looks like a hand in the bottom corner, even though it there was no hand there. This is what I think what makes these images interesting. I think it looks better when the water was splashed more because more ripples were created. If I did this again I would try different effects like dripping or pouring water into the tray to see how it effects the ripples.
No comments:
Post a Comment